
There are two types of brakes you can have on your mountain bike, hydraulic and mechanical. From my research it is a matter of preference which one you choose. But there are many factors which will determine which one you finally decide to choose. So we are going to look at mountain bike hydraulic brakes vs mechanical brakes so we can compare the two together.
How do they work
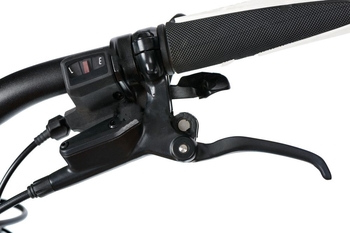
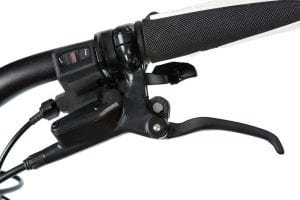
Hydraulic disc brakes use a fluid in order to push the brake pads against the rotor in order to stop your bike. When you squeeze on the brake lever with your hand a plunger pushes the fluid through the hose or housing and into the caliper which then pushes the brake pads against the rotor.
Mechanical disc brakes use a cable in order to pull on the caliper. It pulls the caliper down which then screws in a washer type piece, which then pushes the brake pad on to the rotor.
Aligning your mountain bike hydraulic brakes vs mechanical
Every once in a while you are going to need to realign your brake pads because over time and after much riding the pads will wear away. This will reduce your braking power because the pads will be farther away from the rotor and or they will be uneven which can cause squeaking. This is annoying.
Hydraulic
- The alignment procedure that you need to do for your front and rear brakes is the same.
- First you need to make sure that the caliper body can move easily from side to side. Do this by loosening the mounting bolts. Just loosen them, don’t take out the bolts.
- Next you need to center the caliper body over the rotor. Do this by squeezing the brake lever. While holding the brake lever tighten in the bolts.
- Let go of the brake lever.
- Test if the pads rub against the rotor by spinning the wheel. If there is no rubbing the pads are aligned. You can now secure the mounting bolts by tightening them fully. Tighten to 6 to 8 Newton meters.
- If the pads are still rubbing against the rotor, loosen one bolt at a time and adjust them until there is space on both sides between the rotor and the pads. When the pads are not rubbing at all tighten completely all mounting bolts at 6 to 8 Newton meters and you are finished.
Mechanical
- First get the wheel seated all the way in the dropouts, this is to make sure the rotor is correctly positioned before you start.
- Elevate the bike and spin the wheel, so you can inspect the rotor. If the rotor has a lot of lateral movement, that can make it difficult to adjust the pads so they don’t rub the rotor.
- Now turn the barrel adjusters all the way in at the lever and caliper, make sure the lever arm is released and is in its relaxed position.
- By loosening the cable pinch bolt this ensures full lever arm travel during braking. Next pull the cable tight so it is free of slack and tighten the cable pinch bolt. As the pads wear away they should be moved closer to the rotor with the adjustments being done at the caliper.
- When adjusting the brake pads, there is not much difference overall between hydraulic and mechanical. Mechanical seems to have a few more bolts to turn and you need to set up your bike a little more.
Maintenance hydraulic vs mechanical
Maintaining your brakes is of course is very important. For hydraulic brakes you will need to bleed them and for mechanical brakes you need to replace the cable.
Bleeding hydraulic brakes
Before we can begin, we are going to need:
brake fluid
mineral oil if Shimano brake
DOT 4 for other brands
bleeding kit (funnel and syringe)
brake block
7mm spanner
Allen keys
brake cleaning fluid
rag
Prepare your bike
- First give the hose of your bike a check so that there are no holes or other damage. We don’t want to have any air go into the system.
Check the connectors at the brake lever and down at the caliper so they are tight. - Adjust this brake lever to 45 degrees on the handlebars, and make sure the free stroke is tightened up all the way clockwise.
- Remove the pads from the caliper by removing the clip from the pin. Take pads out of the caliper, and push pistons back into the caliper.
- Now go up to the brake lever and remove the bleed screw using a 2mml Allen key, then attach the funnel of the bleed kit.
- With the pistons pushed into the caliper, fit a bleed block to the caliper and fasten it with the pin you used to keep your brake pads in.
Bleed the brakes
- Fill the syringe half full with brake fluid. Once it is about half full, tip the syringe up so the air goes right up to the hose or to the top of the syringe where the hose meets it. Then push that air out of the syringe, so the hose is completely full of oil and has no air bubbles.
- Attach hose to the bleed nipple, make sure no air gets in. Using your 7mm spanner, just give it an eighth of a turn so that it open up. Push on the syringe to push fluid through the hose. It will come up through the system and into the funnel at the brake lever.
- When the oil is black then it is old and no good anymore. You should flush new oil through the system 2 or 3 times a year.
- Keep pushing on the syringe so no bubbles go through and into the funnel. Dump the black oil that comes into the funnel.
- Now reattach the funnel and add more new oil in the syringe and do it again. You should see fresh new oil going into the funnel which means all the old oil is out.
- Keep pushing the syringe until there are no bubbles coming out of the brake lever. Tighten the bleed nipple, and you are finished with the syringe and bleeding.
Mechanical replacing the cable
Before starting make sure you have these tools:
new cable
Allen key 5mm
cable cutters
file
pick
- First undo the outer part of the grip tape. Once you see the cables, take a look at how they are arranged against the bars before you remove the tape that is holding them in place.
- Starting with the front brake, loosen the crimping bolt with your Allen key. Pull the cable clear of the vice. If the cable is frayed then cut that part off with your cable cutters to make things easier when it comes time to pull out the cable.
- Next push the inner cable out through the shifter, make a note of exactly where you will need to push the new one back through. Now also the outer cable for the front brake will be free. As you pull it away make a note if there is a ferrule on the end of the cable as it goes into the shifter.
- Then put it aside so you can use it as a marker later to make sure the new cable is the right length. Next push your new inner cable back through the shifter. Do it carefully so it does not fray.
- When that is done replace the covering cap if your shifter has one. Next cut your new outer cable to the correct length using the old cable as a guide. Use the pick to open up the inner part of the outer cable that you have crimped. When you cut it file away any sharp edges.
- If you need ferrules on either end, put them on now. Make sure the barrel adjuster is screwed most or all of the way in on the calipers. Then we can push the inner cable through the outer and then slide the outer cable into the shifter.
- Finally, place the inner cable through the barrel adjuster of the brake caliper and pull it through until the outer cable settles into place. We can then thread the inner cable through the crimp part of the caliper.
The reason why I went through how to maintain hydraulic and mechanical brakes in such detail is so you can know what each one entails. This is important because you will need to consistently maintain your brakes.
If you like to use fluids, funnels, and syringes and you are happy bleeding your brakes then a hydraulic brake system is for you. If you like the idea of using cables, cable cutters, an Allen key, a file and pick, then mechanical brakes are good for you.
What riders say about maintenance- hydraulic vs mechanical pros and cons
Pro hydraulic
Maintenance only needs to be done once in a while.
I have had my bike for three years and I have only needed to bleed it once.
Con hydraulic
It is frustrating to do maintenance. Rotors and brake pads can be ruined because of the brake fluid. Bleeding you brakes can be expensive if you have a bike mechanic do it for you.
I don’t like to mess with oil, syringes, hoses, and cleaning up.
Pro mechanical
I only need to use an Allen key.
My Avid BB7’s need to be adjusted every once in a while. It is easy and fast, not too often.
Con mechanical
You have to consistently adjust and tweak them in order to get full use of your brake pads. On hilly terrain that I ride I have had to tweak them every week.
Stopping power hydraulic vs mechanical
From my research I found one stopping power test. It was between a hydraulic Shimano BRM 355 and a mechanical Tech Joe Aires. Both were Diamondbacks with 27.5 inch tires.
The Shimano stopped after 20 feet 4 inches, and the Joes Aires stopped after 19 feet 6 inches. This is very close so the stopping power was basically the same. There was no mention of how fast they were going, both bikes rode on dry pavement.
Another test I found was between SRAM disc brakes and SRAM rim brakes. I don’t know if the disc brakes were hydraulic or mechanical but I think the results are worth mentioning. There were four tests done in different conditions and for every test the bikes were going 40 kilometers when they began to stop.
- The first test was in dry weather, on a good road surface, and the result was the same stopping distance.
- The second test was also in dry weather, but on a gravel road. The disc brake bike stopped 2 meters earlier than the rim bike.
- The third test was in wet weather, on a poor road surface. The disc brake bike stopped 3 meters sooner than the rim brake bike.
- The last test was in wet weather, and the disc brake bike stopped 7 meters sooner than the rim brake bike.
So in dry weather and on dry pavement they stop equally well. But as the conditions worsen disc brakes are clearly better. This is because rim brakes which stop the tire will become wet more easily.
Plus disc brakes have better modulation allowing you better control of the clamping force on the discs. Whereas it is easier for rim brakes to lock up, making it more difficult to slow down.
Returning to the first test between hydraulic disc brakes and mechanical disc brakes it makes sense that both have equal stopping power in good weather and on a dry surface. Why, because they are both disc brakes.
But when the conditions become worse as in the disc brake vs rim brake test, then modulation plays a stronger part in the results.
Knowing that hydraulic brakes have better modulation than mechanical brakes we can assume in poor weather conditions and poor trail surfaces that hydraulics will stop better than mechanical. Though probably not by much of a margin.
Disc brake advantages hydraulic vs mechanical
Hydraulic advantages
- Modulation is very good. You can control how fast or slow you stop without locking out your tires. This helps you to stop in all weather conditions and surfaces.
- You can use one finger when squeezing the brake lever. Less effort is required at the brake lever in order to push the pads to the rotor in order to stop. This also helps your hand remain strong on long mountain bike descents, less fatigue.
- The hydraulic brake system is fully enclosed, there is less chance that dirt, water, or mud will get into the system. This will make them longer lasting.
- Braking is much smoother because the brakes are self adjusting, fluid is pushed by a plunger uniformly to the pads.
- Requires less maintenance and adjustments. Usually around once a year.
Hydraulic disadvantages
- If your brakes break for any reason while on the trail there is no way to fix it. You are not going to carry around extra oil, hoses, funnel, and syringe.
- Bleeding your bike takes some skill, time, and is messy. You must follow a step by step process, and oil may get on the brake pads.
- On long descents the oil could boil from the heat. This can create air bubbles which can stop the brakes from braking properly.
- More expensive
Mechanical advantages
- Easy to adjust and tweak when needed. All you really need is an Allen key.
- Less expensive. You only need to replace the cables and pads.
- Ride your bike anywhere without the fear of it breaking down. You can fix it in the field.
Mechanical disadvantages
- Less modulation, especially in poorer conditions.
- More friction within the housing.
- Dirt and debris can more easily get into the braking system.
- Cables will stretch over time and use.
Comfort and feeling hydraulic vs mechanical
Hydraulic brakes are very smooth, you can feel that when you sqweeze the lever. There is a good feel of strength, and modulation. When going down a mountain good modulation will increase your feeling of confidence.
Mechanical brakes are not as comfortable because you can feel the cable in the housing when you squeeze the brake lever. You will need to squeeze the brake lever harder if you want to stop sooner.
Conclusion
Which one is better. I wouldn’t say one is better than the other, they are both disc brakes. One uses cables and the other uses fluid in its simplest terms. I’d say it is a trade off, different riders have different preferences when mountain biking.
When choosing which disc braking system to have for your bike think about what you are willing to live with and what you are willing to live without for each system.
If you currently have mechanical disc brakes and you are happy with them while considering all aspects of them, stay with them. If you are looking to get a new mountain bike and you are excited to experience the benefits of hydraulic disc brakes and you can afford it, get them.
Related
Top 15 mountain bike maintenance tips