

We are going to take a look at the top mountain biking skills which are essential for you to become the best mountain bike rider you can be from basic to advanced level.
1. Attack Position
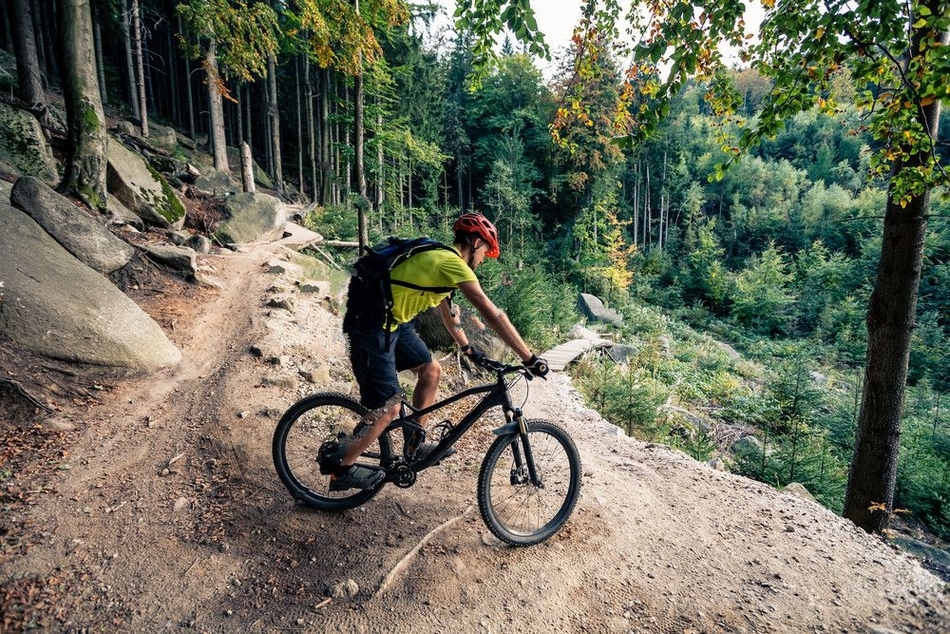
This position is the most important position because it is the foundation to which all other body positions come from. The main benefit of this position is that it is the most stable and balanced position for the bike and the rider to be in.
- Do make sure you are standing on the pedals while they are on a level position.
- Don’t move your body weight forward or backward, you want your weight to be evenly distributed between the front and the back.
When to use the attack position. You will normally use this position especially when going downhill, but you can use it on any section of the trail when you feel you need more control and stability of your mountain bike.
2. Mounting and Dismounting
Mounting and dismounting is just getting on and off your bicycle. This may seem very simple and unimportant if you are just biking for fun. But doing this correctly and efficiently can save you lots of time and help you to prevent any injuries.
- Do use a rolling dismount in order to get off your bike fast, and always dismount to the left.
- Don’t use a standing mount, it is just too slow compared to a running mount.
When to mount and dismount quickly. You will normally get on and or off your bike quickly when you come across unridable terrain and or need to recover from a crash. Unridable terrain could be extremely muddy ground, very narrow rock garden or an obstacle blocking the trail.
3. Trackstand
Doing a trackstand is the ability to stay on your bike without moving forward or backward. You are able to balance on your bike in a still position with both tires remaining on the ground. Practicing this will improve your balance and
- Do try to stay upright without unclipping, and turn your front wheel back and forth slightly to keep balance.
- Don’t tense your body and keep both tires on the ground.
When should you do a trackstand. You won’t need to do a trackstand but you will need to use its balancing ability. You will need this on technical trails, weaving your way through narrow paths, riding over rocks, going onto logs if needed.
4. Ratcheting
Ratcheting, also known as ratcheting the pedals means you pedal forward a little and then and then backward a little. This helps you to go forward little by little without going too fast. It will improve bike handling through obstacles.
- Do stay seated while ratcheting, it is more difficult to ratchet and stay balanced if you stand.
- Don’t ratchet the pedal too far forward or too far backward or it will be more difficult to ratchet the pedal in the other direction.
When will you need to use ratcheting. You will normally ratchet your pedals when you want to avoid an obstacle. A rock garden for example which has tall rocks and does not allow you to do a full pedal stroke. Or going through water or mud and you want to avoid getting your feet muddy or wet.
5. Manual Pumping or Front Wheel Lift
Manual pumping is while you are coasting on your mountain bike you lift up the front tire into the air for a second or two. This helps you to start riding up and over a small obstacle that is on your path. This type of maneuver is considered one of the intermediate mountain bike skills that you should know.
- Do make sure you have momentum going forward because when you perform this skill you will not be pedaling.
- Don’t pull the handlebars into to you as if you were doing a reverse curl with a barbell.
When will you need to use the front wheel lift. This technique is most often used when you need to go over a small obstacle like a small rock, log, or large roots on the trail. You will more commonly use it on flat trails as well as downhill trail when small obstacles can be more dangerous.
6. Braking
Braking your bike basically means how you stop your bike using brakes. You might be surprised to know it is one of the most important skills to be good at. It will help you to go faster overall while at the same time keep you safe.
- Do make sure you maintain control, especially in rough terrain conditions.
- Don’t brake too often, only when necessary. Otherwise tires, suspension stiffens, and muscle tighten.
When do you need to put on the brakes. Usually you should break when you are going too fast. Other times to brake are going downhill at certain times, just before you are going to turn a corner. Brake on good ground with smooth traction.
7. Cornering
Cornering is the act of riding your bike through a turn or a corner while still going fast and staying in control. This will help you to not brake so often, and it will increase your time and speed on the trail.
- Do look as far as you can into the turn, so you can decide where to enter and where to start braking.
- Don’t go too fast, and don’t drop your outside foot when cornering.
When are you going to use cornering. Obviously you will be cornering whenever you are going to go around a turn. Get into your attack position we spoke of earlier, lean into the turn, and look where you are going.
8. Berms
A berm or a bermed corner is a turn which has an embankment which goes up diagonally. It is a banked outer edge which runs the full length of the turn. This is good to master because then you can really go fast around a turn.
- Do lean into the berm as you go around it. Lean into the center of the turn.
- Don’t use your brakes too much while in the berm. Don’t ride your brakes, your purpose is to go fast.
When will you use a bermed corner. Generally when you are in a race you will use a bermed corner because the trail is customized to have berms. You may also come across a natural berm when riding on more hilly trails near mountains.
9. Off Camber
Off camber means you are riding your mountain bicycle across a hill instead of straight down it. You are forcing your bike to go against gravity. This is beneficial if the trail you are on demands you ride on the side of a hill. Other less advanced riders will not be able to follow you, they will need to find another path.
- Do lower your center of gravity, become looser and heavier in your body for grip, and look forward even farther.
- Don’t brake too hard, because the back tire will lose its grip and you will skid out.
When will you use the off camber. If you are riding on intermediate of advanced trails you will usually come across off camber areas of a trail. You will also see off cambers on a race course or on a customized trail.
10. Switchbacks
Many new riders have not heard of switchbacks, probably because they are very difficult. Switchbacks are extremely tight turns, you are just about doing a 180 degree turn. Being able to do this skill means you are an advanced rider and you should be very proud.
- Do take a wide line if you can when entering the switchback, so you have more room to turn.
- Don’t just look at the corner you are turning on, this will narrow your field of vision too much and you won’t be prepared for the exit.
When are you going to use a switchback. Anytime you are riding on advanced trails you will come across switchbacks. You may also need switchbacks when going off trail down a hill with a lot of trees. You will need to switchback around trees.
11. Wheelie
A wheelie is when you lift up your front tire and hold it above the ground at around a 45 degree angel while you keep riding your bike forward. You can be pedaling or coasting when you do this. This is useful for showing off as well as being the first step when going over small obstacles.
- Do keep your arms straight and use your body weight to lift the front wheel.
- Don’t try to muscle up the front wheel by pulling up on the handlebars and bending your arms.
When should you pop a wheelie as it is commonly known. You can use it to get your front wheel onto a ledge or a high curb or stone. Use a wheelie to get up and over small hill at faster speeds instead of just riding over them.
12. Rear Wheel Lift
A rear wheel lift is exactly how it sounds. You lift up the rear wheel of your bike and turn it left, right, or continue straight ahead. This helpful when going around sharp turns, and for going over small obstacles.
- Do shift your weight back, then lunge forward, shifting your weight forward.
- Don’t look up, keep your head down, weight on the handlebars as you lift up the rear wheel.
When should you lift up the rear wheel. A common use of lifting up the back wheel is when you need to go over small obstacles such as a log, small rocks and going up over a ledge. It is also used when doing a switchback when the turn is very sharp.
13. Bunny Hop
A bunny hop is when you hop over a small obstacle with the front wheel and then the rear wheel. The obstacle is too big to go under the chainring so you need to hop over it. This is helpful when you can’t go around a small obstacle and it will help you continue riding quickly so there is no delay.
- Do lower your seat, so you have enough room to move forward and backward during the bunny hop.
- Don’t try to lift both wheels at the same time. It is not very powerful and the timing is difficult
When should you do a bunny hop. Anytime you see a small obstacle which is taller than the chainring on your bike you will need to do a bunny hop. This will include things like a log, rock, branches on the trail, a thick exposed root system.
14. Small Drop Offs
A small drop off is when you allow your front wheel to roll down off a drop. This is beneficial for maintaining your speed when you are going off a drop. You don’t want to have to slow down too much if you want to make good time on the trails.
Do a manual front wheel lift as you are approaching the drop off.
Don’t ride the front wheel down the drop off or you will probably fly over the handlebars.
When should you do a drop off. Anytime there is a small drop on your path you need to do a drop off so you won’t lose speed. You might be going down a hill with small drops along the way, or even on a flat surface with hidden drop offs.
15. Big Drop Offs
Big drop offs are when you are riding you then sort of ride off a cliff and the landing area is around 4 to 20 feet away. This technique is helpful if you want to master advanced mountain bike trails. It will also give you confidence and bravery that you thought you never had.
- Do all your braking before the drop so you can maintain an even speed and balance during the drop.
- Don’t land on one wheel for bigger drops, either the front or the back, land on both wheels at the same time.
When should you do a big drop off. Sometimes on a more advanced trail a big drop off will be hidden, so you will be forced to do one whether you like it or not. Other times if you want to compete and race you will need to get good at big drop offs if you want to have any chance of improving and winning a race.
16. Jump
Jumping when it comes to mountain biking means you do a bunny hop while going off a dirt ramp. This is very beneficial to keep up your speed and to ride farther when going over a ramp. If not then you will only gain height and not distance.
- Do the three actions of the bunny hop, the pop, the pull, and the push.
- Don’t forget to pull and push your bike. If you only pop, you will only get height.
When should you do a jump. You may need to do a jump in order to get over a log, or a narrow stream. If you wanted to move up to an advanced level you will need to jump because advanced trails have jumps. Jumping properly can help you will a race.
17. Drifting
Drifting is when you ride around a turn and you make your back tire slide around the turn. This is not skidding it is drifting, naturally sliding with the back tire through a turn. This helps you to go into and through a turn faster and smoother without braking.
- Do have your head up and make sure to look for your exit.
- Don’t go into a turn for drifting too slow, speed is key when you want to drift.
When should you drift on the trail. Ideally you will want to use drifting whenever you see a flat smooth turn. If other riders are not drifting around turns then you should drift so you can go faster than they do. You can also drift for fun, because it is cool.
18. Rock Garden Riding
Rock garden riding does not mean you are riding on rocks, but you are riding your bike over a group of rocks which are close together. This will prevent you from having to get off your bike and walk through the rock garden.
- Do look for the most direct line, the smoothest line, and the safest line on the rock garden.
- Don’t be stiff and tense. Drop your heels, loosen your hips, bend your arms, and loosen your grip.
When should you ride through a rock garden. If you are at an intermediate or advanced level you should start practicing going through rock gardens. If not then it is a good idea to get off your bike and walk through the garden so you can see what to expect.
19. Unweighting and Weighting
Unweighting is when you make your body lighter through body pressure, and weighting is when you make your body heavier through pressure. This is beneficial for when you are going over different types of terrain.
- Do use both your arms and legs to push yourself up and away from your bike.
- Don’t start in an upright position, use the attack position so you have more room to go up and away.
When should you use unweighting and weighting. You will unweight your bike when going over short rough sectins of trail and when you want to go over a small obstacle. You will want to weight your bike when you want more tire grip on the trail. This will be when you are berming, and off cambering.
20. Riding Roots
Riding roots means you ride your mountain bike over roots which are on your path. This will help you to avoid having to dismount from your bike and walk over the roots or go around them. Plus this will save you a lot of time.
- Do hit the roots square on, trying manualing over them, and bunny hopping over them.
- Don’t brake while you are riding over the roots, the wheels may slip out from under you.
When should you ride over roots. If you want to get better at mountain biking then you need to become good at riding over roots quickly. To avoid having to go around roots you’ll need to ride over roots. During a race the trail may demand that you go over roots to get through the race.
21. Rolling Turning Endo
Doing an endo is when you turn or change the direction of your bike by lifting up the rear tire and swinging it to the left or the right while the front tire remains on the ground. This is great for very tight turns and switchbacks.
- Do apply the front brake and shift your weight forward onto the handlebars.
- Don’t brake too hard or too suddenly, or the rear wheel will pop up too much and you may fly over the handlebars.
When should you do an endo. Doing a straight endo really has no purpose other than showing off. You will want to do a rolling turning endo when going around tight turns or when doing a switchback down a hill.
Practice these skills for mountain biking diligently and you will be able to really improve your riding.