
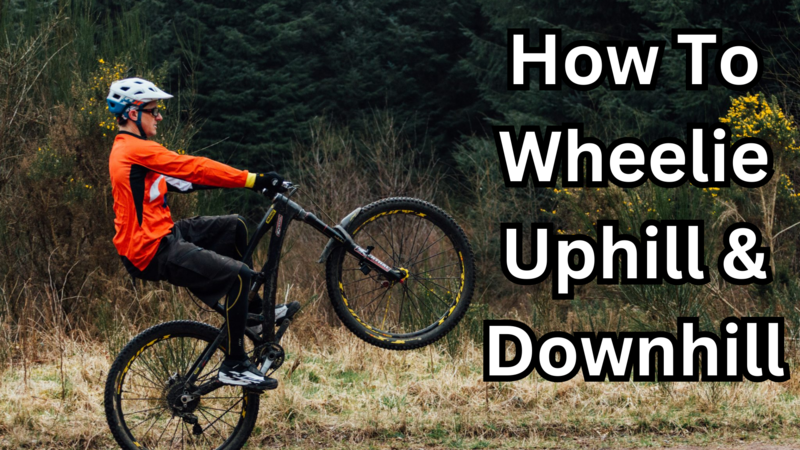
Performing a wheelie on a mountain bike is more than a trick, it’s a testament to your skill, balance, and control. When you take it beyond flat terrain, wheelies become even more crucial, particularly when facing uphill or downhill slopes.
Mastering these skills not only adds fun and excitement to your rides, but it also equips you to overcome obstacles and handle unexpected changes in the trail more effectively.
This guide will provide you with insights into the art of performing wheelies uphill and downhill, helping you conquer any slope with confidence and style. Let’s delve into this exciting skill and discover how it can transform your mountain biking experience.
Prepping Your Bike for Uphill and Downhill Mountain Bike Wheelies
The right bike setup is crucial for successfully performing a wheelie. If not then you might damage your mountain bike doing a wheelie. Here are more specific recommendations on tire pressure, seat position, and gear selection.
Tire Pressure
- Typically, mountain bike tires should be inflated to a pressure between 30 and 50 PSI (pounds per square inch), depending on your weight, riding style, and the terrain.
- For wheelies, you might want to go towards the lower end of this range to increase grip and make it easier to lift the front wheel. Start with around 30 PSI, then adjust based on your experience. Be careful not to go too low and risk a pinch flat, especially when coming down from the wheelie.
Seat Position
- The height of your saddle can influence your center of gravity and your ability to balance during a wheelie. A mid-level position is a good starting point.
- This means adjusting the seat so that when you’re sitting on the bike with a foot on a pedal in its lowest position, your knee has a slight bend, roughly a 25-30 degree angle. You can adjust up or down slightly from there based on comfort and success in performing the wheelie.
Gear Selection
- The ideal gear can depend on your strength, your bike, and the terrain. Generally, a medium gear works well for wheelies.
- On a bike with a typical 3×9 gear setup, you might want to start in the small or middle front chainring (1st or 2nd) and a middle rear cog (around 4th or 5th). This should provide enough resistance to keep the wheelie going without making it too hard to start.
- These are guidelines and starting points. Individual preferences can vary, and you may find slightly different settings work better for you. Experimentation and practice are the keys to finding the optimal setup for your wheelies.
Mastering the Uphill Mountain Bike Wheelie
Detailed Step-by-Step Guide on How to Wheelie Uphill
1. Starting the Wheelie:
a. Positioning and Balance
Begin by standing on the pedals in a ready position. Your pedals should be level, and your dominant foot should be forward. Your body weight should be centered over the bike, with your chest low and over the handlebars, and your gaze focused on the trail ahead.
b. Gear Selection
You’ll want a slightly lower gear than you would typically use for a flat terrain wheelie. If you have a standard 3×9 gear setup, try starting with the small front chainring (1st) and a gear in the upper
middle range in the back (6th or 7th). This will allow you to generate torque to help lift the front wheel, but it’s not so low that you’ll pedal out too quickly.
c. Pre-Lift Push
Push your weight down towards the bike and slightly forward, bending at the ankles, knees, and hips, while keeping your arms and wrists flexible.
This action is similar to a mini-squat on the bike, compressing the suspension if your bike has it. The goal is to use the bike’s rebound from this action to help lift the front wheel.
d. The Pull-Up
As the bike rebounds, simultaneously straighten your legs and pull up and back on the handlebars while pedaling down hard with your dominant foot. Imagine trying to pedal through the bottom of the stroke and scoop backwards.
Your arms should pull the handlebars towards your hips, and your wrists should roll back. This motion, combined with the forceful pedal stroke and the bike’s rebound, will lift the front wheel off the ground.
e. Rear Brake Control
Have a finger resting on the rear brake lever at all times. Applying the rear brake will drop the front wheel and prevent you from tipping over backward. It’s the ultimate safety net when learning and practicing wheelies.
Starting a wheelie on an uphill slope can be more challenging due to the extra gravitational pull working against you. Don’t get discouraged if it doesn’t happen immediately.
Remember, balance and timing are crucial, and these come with practice. It’s a delicate interplay between your pre-lift push, the pull-up on the handlebars, the power of your pedal stroke, and maintaining your momentum up the hill.
2. Balancing and controlling the bike
Once you’ve started the wheelie and your front wheel is off the ground, the challenge now becomes maintaining the balance and controlling the bike. Here are some key tips to keep in mind:
a. Center of Gravity
- The key to a sustained wheelie is finding and maintaining your balance point, where your center of gravity is directly over the rear wheel. This might feel as if you’re leaning slightly backward.
- You control your forward and backward balance mainly by pedaling (for forward adjustment) and using your rear brake (for backward adjustment). If you feel like you’re falling forward, pedal a bit harder. If you feel like you’re going to tip backward, gently apply the rear brake.
b. Body Movement
- Use small movements of your body to help maintain side-to-side balance. If you feel the bike leaning to one side, counteract by shifting your weight slightly to the opposite side. Your knees are especially useful for this. Keep them slightly bent and away from the bike so you can use them as counterbalances.
c. Rear Brake Use
- Mastering the use of the rear brake is crucial for controlling a wheelie. Too high, and a light tap on the brake will bring the front wheel down. If you drop too low, a powerful pedal stroke will bring it back up. Your finger should always be on the brake lever, ready to make minor adjustments as needed.
d. Looking Ahead
- Keep your gaze focused on the trail ahead and not on your front wheel. This will help you maintain a better balance and prepare for any changes in the terrain.
e. Modulating Speed
- Uphill wheelies require continuous pedaling to maintain momentum against the gradient. Find a rhythm in your pedaling that allows you to keep your balance without losing too much speed.
f. Grip
- Maintain a firm but relaxed grip on the handlebars. A tight grip could tire you out quickly and make it harder to control the bike.
- Remember, performing a wheelie, especially uphill, requires a lot of practice and fine-tuning. Each time you practice, aim for longer durations and smoother control. Before you know it, you’ll be wheelie-ing your way uphill with confidence and finesse.
3. Overcoming the extra challenge of gravity
An uphill wheelie adds an additional layer of complexity due to the added force of gravity working against you. It demands more power, control, and endurance to maintain the wheelie while also moving uphill. Here’s how to tackle this unique challenge:
a. Extra Power
Since you’re fighting against gravity, getting the front wheel off the ground might require a stronger pedal stroke and a more forceful pull on the handlebars than on flat ground. Be prepared to exert more energy when starting the wheelie and throughout its duration to maintain momentum uphill.
b. Smart Gear Selection
Choosing the right gear becomes even more critical when wheelie-ing uphill. You need a gear that provides enough resistance to lift the front wheel but isn’t so high that it becomes too hard to pedal and maintain the wheelie against the incline. This will often be a lower gear than what you’d use for a flat surface wheelie.
c. Consistent Pedaling
To keep your momentum going uphill, you’ll need to maintain a consistent pedaling rhythm. Too slow, and you might not keep up with the incline; too fast, and you risk losing balance and control.
d. Lean Back
Because of the uphill angle, you might need to lean slightly further back than you would on flat ground to find your balance point. Be careful not to lean too far back to avoid tipping over.
e. Rear Brake Mastery
The rear brake becomes even more essential for an uphill wheelie. Because of the slope, the risk of falling backward is greater. Learning to feather your rear brake to control your balance point is a crucial skill for maintaining an uphill wheelie.
Keep in mind that the steeper the incline, the more difficult the wheelie will be. Start with a gentle slope and gradually work your way up to steeper hills as your skills and confidence grow.
As always, practice is key, and with persistence and patience, you’ll conquer the extra gravitational challenge.
6 Common Mistakes When Wheelieing Uphill and How to Avoid Them
Even experienced riders can make errors when trying to wheelie uphill. Recognizing and correcting these common mistakes can significantly improve your technique and success rate. If you are not experienced then review how to do a wheelie for beginning mountain bikers.
1. Lifting the Wheel Too High
- One of the most common mistakes is lifting the front wheel too high. This not only throws off your balance but also risks tipping over backward. To avoid this, focus on a controlled pull on the handlebars and a forceful but balanced pedal stroke to lift the wheel just enough to find your balance point.
2. Neglecting the Rear Brake
- Failing to use the rear brake effectively can lead to a loss of control, particularly when you’re in the balance point and you start falling backward. Always keep a finger on the rear brake lever and get comfortable applying it gently to bring the front wheel down and regain balance.
3. Incorrect Gear Selection
- Choosing a gear that’s too high can make it challenging to generate enough power to lift the wheel and maintain the wheelie, while a gear that’s too low can cause you to pedal out quickly and lose balance. Practice with different gears to find the one that works best for your uphill wheelie.
4. Inconsistent Pedaling
- Inconsistent or interrupted pedaling can make it difficult to maintain the necessary momentum for an uphill wheelie. Aim for a steady, rhythmic pedaling cadence that keeps you moving upward without compromising your balance.
5. Tensing Up
- When trying to wheelie, especially uphill, it’s easy to tense up, but this can actually hinder your balance and tire you out quickly. Try to relax, keep a light grip on the handlebars, and let your body move fluidly with the bike.
6. Not Looking Ahead
- If you’re looking at your front wheel, you’re not seeing the changes in the terrain up ahead. Always look forward on the trail. This helps with balance and prepares you for any adjustments you need to make for changing terrain.
- Remember, everyone makes mistakes when learning new skills. The key is to learn from these mistakes and keep practicing. Over time, with patience and perseverance, you’ll improve your uphill wheelie technique and be able to overcome these common mistakes.
8 Tips and Exercises to Improve Uphill Wheelie Skills
Consistent practice is the key to mastering any skill, and uphill wheelies are no exception. Here are some tips and exercises to help you improve your technique:
1. Start with Flat Ground
If you’re new to wheelies, start by practicing on flat ground before moving to an incline. This allows you to get comfortable with lifting the front wheel and finding your balance point without the added challenge of uphill terrain.
2. Progressive Overload
Gradually increase the difficulty of your practice sessions. Start with gentle inclines and work your way up to steeper hills. Similarly, begin with short wheelie attempts and gradually increase the distance as your balance and control improve.
3. Brake Control Exercises
Spend time specifically practicing your rear brake control. Try to ride a wheelie and use only the brake to bring the front wheel down. This will help you get a feel for how much brake pressure is needed to adjust your balance point.
4. Balance Exercises
Practice other balance-focused skills like track stands or slow riding. These can improve your overall balance and bike handling skills, which will benefit your wheelie technique.
5. Interval Training
Practice wheelies in short, focused intervals. For example, try to maintain a wheelie for 10-20 seconds, rest for a minute, and then repeat. This can help improve your endurance and wheelie duration over time.
6. Visualization
Spend some time visualizing the correct technique. Picture yourself successfully performing an uphill wheelie. Visualization can help reinforce the correct movements and techniques in your mind.
7. Stay Consistent
Aim to practice regularly, even if it’s just a few minutes each day. Consistent practice is the best way to improve.
8. Stay Patient and Positive
Learning to wheelie, especially uphill, can be challenging and may take time. Keep a positive attitude, be patient with yourself, and celebrate your progress, no matter how small.
Remember, safety should always be your top priority. Always wear appropriate safety gear and only practice in safe, suitable locations. With consistent practice and the right approach, you’ll see improvements in your uphill wheelie skills over time.
Mastering the Downhill Wheelie
Detailed Step-by-Step Guide on How to Wheelie Downhill
1. Starting the Wheelie:
a. Positioning and Balance
- Start by standing on the pedals in a ready position, with your pedals level and your dominant foot forward.
- Given the slope, you’ll want to lean a bit further forward than you would for a flat or uphill wheelie, so adjust your center of gravity accordingly. Aim to keep your weight centered over the bike for the best balance.
b. Gear Selection
- Select a higher gear for a downhill wheelie, around 3rd or 4th on a typical 9-speed mountain bike. The momentum from going downhill will assist in lifting the front wheel, but a higher gear will provide the needed resistance to maintain control and balance.
c. Pre-Lift Push and Pull-Up
- Compress your bike’s suspension (if available) by pushing down slightly on the bike. Then, simultaneously pull up on the handlebars and perform a strong pedal stroke with your dominant foot.
- Given the downhill momentum, your pull on the handlebars should be about 70% of the force you’d use for a flat or uphill wheelie.
d. Rear Brake Control
- Ensure a finger is on the rear brake lever before you start the wheelie. This will allow immediate response if you lift the front wheel too high. Because you’ll likely gain speed faster downhill, it’s even more crucial to be ready to feather the brake to control the wheelie.
- Starting a wheelie downhill can seem more challenging due to the speed increase, but the key is to use the downhill momentum to assist in lifting the front wheel while controlling the speed and maintaining balance.
- Practice on gentle slopes before moving onto steeper ones as you become more comfortable. Always remember to wear your safety gear and practice in a safe location.
2. Balancing and Controlling the Bike for a Downhill Wheelie
Balancing and controlling the bike during a downhill wheelie can be more challenging than on flat ground or uphill due to the added speed and momentum. Here’s how to manage:
a. Maintain a Forward Stance
Unlike a flat or uphill wheelie where you lean back, a downhill wheelie requires a more forward stance to counterbalance the downhill slope. You should still have your weight centered over the bike, but your body will be tilted slightly forward compared to other types of wheelies.
b. Rear Brake Control
The rear brake is your main control tool during a downhill wheelie. As the bike gains speed, use the rear brake to control the speed and maintain balance. Feathering the brake – applying it gently – can help to manage the speed without abruptly ending the wheelie.
c. Pedal Cadence
While you’ll be moving downhill, you still need to pedal to maintain the wheelie. The cadence might be slower than a flat or uphill wheelie due to the downhill momentum, but it should still be steady and rhythmic.
d. Look Ahead
Always keep your eyes looking ahead down the trail, not at your front wheel. This allows you to anticipate changes in the terrain and adjust your balance and control accordingly.
e. Shift Your Weight
You may need to shift your weight slightly side-to-side to maintain lateral balance during the wheelie, especially if the trail is uneven. This should be a fluid movement in sync with the bike’s motion.
Remember, downhill wheelies can be more challenging due to the higher speeds and greater momentum. Start slow, practice regularly, and don’t rush the process. With time and practice, you’ll improve your balance and control during a downhill wheelie.
3. Handling Speed and Gravity for Downhill Wheelies
The nature of downhill wheelies involves a higher speed and a greater influence of gravity, both of which need to be managed effectively for a successful wheelie. Here’s how to do it:
a. Using Gravity to Your Advantage
- Unlike a flat or uphill wheelie, a downhill wheelie has gravity working in your favor to help lift the front wheel. You’ll need less force to start the wheelie, but more skill to control it. Learn to use this to your advantage by adapting your wheelie technique to make the most of the downhill momentum.
b. Managing Speed
- The speed of a downhill wheelie can increase quickly, and it’s crucial to control this to maintain balance and prevent accidents. Use the rear brake effectively to control your speed – it’s not just for bringing the wheelie to an end. Feather the brake gently and regularly to maintain a manageable speed throughout the wheelie.
c. Pedal Stroke Control
- Your pedal stroke plays a key role in maintaining a downhill wheelie. With the bike moving faster, your pedaling cadence will naturally be slower. Focus on controlled, powerful strokes rather than rapid spinning.
d. Body Position Adjustments
- As the speed increases, you may need to adjust your body position for better control. Leaning slightly forward can help counterbalance the downhill slope and provide better control at higher speeds.
e. Expect and Embrace Unevenness
- Downhill trails are often uneven, which can add to the thrill and challenge of a downhill wheelie. Expect this and embrace it as part of the experience. Learn to adjust your balance and control in response to changes in the trail.
- Remember, safety is paramount when practicing downhill wheelies. Always wear appropriate safety gear and only practice in safe, suitable locations. Take your time to get comfortable with the speed and gravity of downhill wheelies before attempting steeper slopes or more challenging trails.
5 Common Mistakes When Wheelieing Downhill and How to Avoid Them
Learning to wheelie downhill can be challenging and it’s common to make mistakes. Here’s a look at some common errors and how to avoid them:
1. Too Much Force on Lift
Given the downhill momentum, it’s easy to apply too much force when starting the wheelie, causing the front wheel to lift too high or too quickly. Remember, gravity is helping you here. Apply less force than you would for a flat or uphill wheelie. Practice with a gentle pull on the handlebars to find the right amount of force.
2. Neglecting Rear Brake Control
Some riders focus too much on lifting the front wheel and forget about controlling the speed with the rear brake. Keep a finger on the rear brake at all times and use it to manage your speed and maintain balance throughout the wheelie.
3. Pedaling Too Fast
With the speed of going downhill, some riders try to pedal too quickly, which can throw off balance and control. Instead, focus on maintaining a slower, more controlled pedal stroke.
4. Looking at the Front Wheel
It’s natural to want to look at your front wheel, especially when learning, but this can throw off your balance and make it harder to anticipate changes in the trail. Always look ahead down the trail to anticipate your movements and keep your balance centered.
5. Not Leaning Forward
Unlike flat or uphill wheelies, a downhill wheelie requires a slightly forward body position to counterbalance the downhill slope. Leaning back too far can cause a loss of control and balance.
To avoid these common mistakes, remember to practice regularly, start slow, and always prioritize safety. Over time, you’ll develop better technique and control, helping you to master the downhill wheelie.
7 Tips and Exercises to Improve Downhill Wheelie Skills
Improving your downhill wheelie skills is a matter of consistent practice and focus. Here are some tips and exercises to help you refine your technique:
1. Begin with Mild Slopes
- Start practicing on gentle slopes before attempting steeper ones. This allows you to get a feel for managing speed and gravity in a controlled way.
2. Rear Brake Control Drills
- Spend time working on your rear brake control. Try riding downhill without a wheelie and just focusing on using the rear brake to manage your speed. This will build your confidence and skill in controlling speed, which is vital for downhill wheelies.
3. Practice Balancing at Higher Speeds
- It’s crucial to get comfortable with balancing at higher speeds for downhill wheelies. Ride downhill on a safe path and focus on maintaining your balance and control at different speeds.
4. Work on Pedal Cadence
- Practice a slower, more powerful pedal cadence. Try this on flat ground first, then move on to practicing while going downhill.
5. Trail Reading Practice
- Learning to anticipate and adjust for changes in the trail is key for successful downhill wheelies. Spend time riding downhill and focus on ‘reading’ the trail ahead, anticipating changes, and adjusting your balance and control in response.
6. Visualization
- Visualization can be a powerful tool for learning and refining skills. Visualize yourself successfully performing a downhill wheelie to help reinforce the correct movements and techniques in your mind.
7. Consistency and Patience
- Consistent practice is key to improving, and patience is crucial. Learning to wheelie downhill can take time, so don’t rush the process. Celebrate small victories and gradual progress.
- Remember, safety should always be your top priority. Always wear suitable safety gear and only practice in safe locations. With regular practice and the right approach, you’ll see improvements in your downhill wheelie skills over time.
Mountain Bike Wheelie Uphill Vs Downhill Comparison Chart
| Aspect | Uphill Wheelie | Downhill Wheelie |
|---|---|---|
| Effect of Gravity | Fighting against gravity to lift and maintain the front wheel in the air. | Gravity assists in lifting the front wheel, but it increases the challenge of controlling the bike due to increased speed and momentum. |
| Gear Selection | Generally, lower gears are used to make it easier to lift the front wheel against the slope. | A higher gear is usually chosen to provide the resistance needed to control the bike while leveraging the downhill momentum. |
| Body Position | A more backward leaning is required to counteract the upward slope. | A more forward stance is adopted to counterbalance the downhill slope. |
| Speed Control | Speed control is primarily managed through pedal strokes. | The rear brake becomes a more critical tool for managing speed due to the increased downhill momentum. |
| Pedal Cadence | Faster, more powerful pedal stroke is needed to overcome the uphill slope. | Slower, more controlled pedal cadence, as the downhill momentum assists in keeping the wheelie going. |
| Control and Balance | Balance and control challenge lies in maintaining the wheelie against the upward slope at slower speeds. | Maintaining control and balance can be more challenging due to higher speeds and greater momentum. |
| Bike Preparation | Bike setup might involve reducing tire pressure slightly to improve grip and adjusting the seat to a comfortable height for pedaling. | Bike setup should include ensuring the brakes are working efficiently and the tire pressure is adequate to handle the increased speed and momentum. |
| Safety Equipment | Standard safety equipment including helmet, gloves, and knee pads. Additionally, shoes with good grip can help in maintaining pedal control. | Safety gear is crucial due to higher speeds. Helmet, gloves, knee pads are a must, along with full-face helmets and body armor for more challenging terrains. |
| Common Mistakes | Starting with too much speed, not leaning back enough, and not pedaling consistently are common mistakes. | Common mistakes include using too much force to start the wheelie, neglecting rear brake control, and not leaning forward enough to counterbalance the downhill slope. |
| Tips for Improvement | Regular practice on mild slopes, consistent pedal strokes, and patience are keys to improvement. | Starting with mild slopes, practicing rear brake control, and getting comfortable with higher speeds can help improve downhill wheelie skills. |