Mountain bikers complain a lot about seats being so hard. Yet manufacturers keep making them firm and rigid.
Why are mountain bike seats so hard? They are hard so the sit bones and soft tissue are supported. Pedaling efficiency and circulation are increased. The crotch area is kept cool. Hard seats prevent the compression of nerves and stops chafing.They also do not absorb sweat and supports the lower back.
Bike seats, also called saddles are known for being uncomfortable. But no one is making them any softer. So how are they being used which makes the discomfort worth it.
How Are Hard Mountain Bike Seats Used
- The sit bones, also called the ischial tuberosity are the bones used when you are seated. They support your weight the most when you are seated upright. So a firm, rigid saddle is needed otherwise you will feel every bump that you go over which will transfer to your lower back.
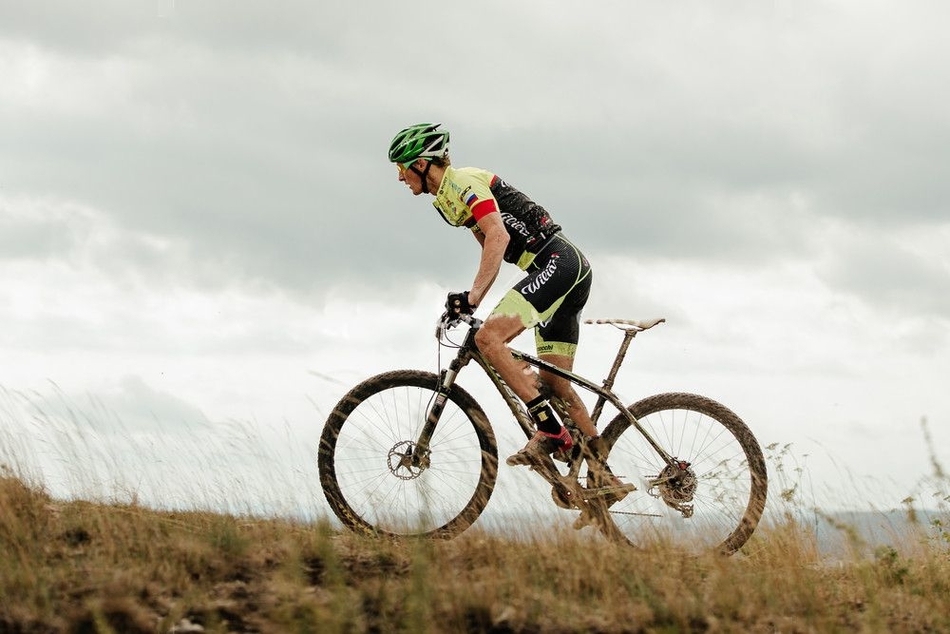
- Mountain biking is a rougher ride than road biking so a hard seat is even more important. Plus mountain bikers ride in a more upright position as than road bikers. At times mountain bikers will need to lean their upper body forward while in the saddle.
- When this happens then the area between the anus and the crotch will need to be supported. In men this is the perineal area and in women this is the lower positioned pubic bone arch. If the seat is soft then these areas will heat up and sweat will be absorbed into the seat causing discomfort.
- By riding on a hard seat the compression of nerves is prevented. If this happens the buttocks will begin to feel numb which will result in a lose of pedaling power and efficiency. Not to mention the annoying discomfort that comes with it. The rider will need to get off his/her bike and stand in order to get their feeling back.
How To Sit on a Hard Seat Properly
The best way to sit on a hard saddle is to be in the correct body position. The body position which is most important and mostly used by mountain bikers is the attack position. Being in the attack position correctly will enable you to get the most out of your seat, while maintaining comfort.
Steps to a good attack position
Weight
- Always make sure that your weight is driving into your pedals. This will lower your center of gravity and save your sit bones from having to support all the weight. An imaginary line should go from your belly button to your bottom bracket. You want to keep your feet heavy and your hands light.
- Do this by slightly shifting your hips forward or backward on the saddle. This is the best way to guarantee fore-aft balance. Just keep feeling for heavy feet and light hands. By focusing on that you won’t even notice your seat or how hard it is.
Knees
- Bend your knees until you are halfway between standing fully straight and touching your seat. This will lower your hips and upper body. By being in a position between standing and hitting your seat, you will be able to move fast up or down in order to handle different terrain.
- This will give you built-in suspension and remove weight from your seat. This position will prevent you from being stiff and inflexible. If you hit something hard you will be able to absorb the impact, and not have your seat absorb it.
Hips
- Next push your hips back. Have your torso bend forward so it is horizontal with the ground. Make sure your spine and tailbone are in line. Now you will be able to use your glutes more by pushing your hips back. Your glutes will not be a sack of potatoes sitting resting on a saddle.
- Your shoulders will naturally come forward which will balance out your hip position. Your belly button will be right over your bottom bracket. This is a strong, yet versatile and flexible position to be in. You will ride with more power and less fatigue, plus minimal saddle stagnation.
Shoulders
- The next step is to lower your shoulders. This will happen by itself when you bring your hips back and your torso is level with the ground. You will have more arm range the lower your shoulders are.
- This extra range is used for cornering, pumping, manualing, jumping, and all the cool stuff. The less arm range you have the more poorly you will ride. This comes from sinking into your hard seat too much and relying on it for support too much.
Elbows
- After shoulders come elbows. Your elbows should flare out until they are in line with your shoulders. Your forearm and upper arm should be at a 90 degree angle. Plus your upper arm and torso should be at a 90 degree angle as well.
- When you have your elbows out you will be stronger. You will be able to use your chest and back, and your biceps and triceps more evenly. Close grip bench press is more difficult than using a wider grip. The same concept applies here. You will be able to push, pull, and lean more effectively.
Head
- Finally, keep your head up. Lead with your chin and look at where you want to go. There is no use looking down at the ground at the trail. Dropping your head down will move your weight too far forward and will put too much pressure on the soft tissues while on your hard seat.
By maintaining your attack position throughout most of the trail you will avoid sitting in your seat. When mountain biking your seat should be used for sitting on the saddle and not sitting in a seat. You are not joy riding, but you are attacking and shredding the trails.
How To Stop Mountain Bike Seat Pain
- Even though you are sitting on your hard seat properly you may experience some discomfort or even pain. The first you can do is to check the position of the seat. Make sure that it is relatively level. Tilt the front of the seat downward or upward testing it after each adjustment.
- Other adjustments you can make are to tilt the seat left or right. Check that the seat is attached to the seat post in the center of the rail. If it is attached too far forward or too far back that can have an effect on how you sit on the seat. Your weight will be distributed too forward or back.
- Generally, point the seat nose down if you are going to climb hills. Point the seat nose up if you are going to go downhill. When you go uphill your weight will be focused on the back of the saddle. When you go down a steep hill then the seat will end up leveling off. You can use the front off the seat for better control going downhill.
- When you move the seat more forward you will then use your quads and kneed more. When you move the seat further back then you will use your glutes and hips. If you are an older rider you may feel more comfortable moving your seat further back.
- Next you can wear long mountain bike shorts which have padding in them. This may make your crotch area heat up which is uncomfortable. So in this case it is a good idea not to wear underwear, just wear the padded shorts for support.
- If you are a new mountain biker then the biggest reason you feel pain while in your bike seat is because you are not conditioned for your bike seat. Your glute muscles are not tough because you have not ridden a lot.
- For new riders you will need to ride a few hundred miles in order to toughen up your butt muscles and soft tissue. If you have some experience then you may just need to ride for a couple of days in order to break in the hard seat. Seats which break in the easiest are made of leather.
- If you are still experiencing pain and discomfort, then it is time to test out different seats. Be sure to test the hard seat for at least 5 or 10 minutes by riding a bike with the particular seat. If you can test it out for longer, that’s better. Try to test at least 10 or more seats to find the right one.

