

Your mountain bike needs to be prepared for winter. The cold, snow, ice, mud, and sleet can do lots of damage to your bike. Winterizing your mountain bike will protect it from the harsh weather conditions of winter, and make riding through it much easier.
1. Clean your bike chain
Your bike chain is what keeps you moving forward, and it is what stops you when you need to stop or slow down. Winter can be especially difficult on your drive train. The snow, mud, and grit that gets into the chain can be like a nasty grinding paste that does lots of damage.
It is essential and worth the time to make sure your chain is very clean after every ride. Take off the grease, grim, and muck, then lube it back up so it is ready to go again. Use a wet lube because it won’t wash off so easily. You don’t want snow and water washing off the lube on your chain.
If your drivetrain is very close to needing to be replaced, then here is a great idea. Only during the winter months, use some less expensive components. During the winter these components will get worn out faster. Then after the winter you can use better more expensive components.
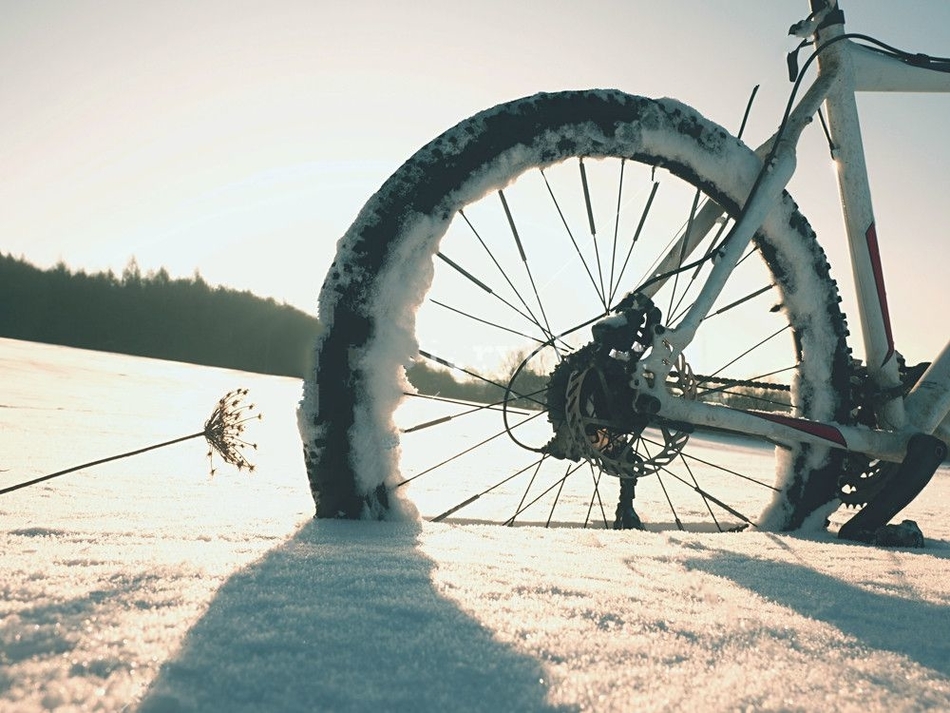
2. Switch to winter tires
If you don’t have the right tires for winter then you might as well stay inside. It will not be fun at all if you can go forward or slow down because your tires have no grip. Get tires for the front and the rear which have tall knobs across the whole tire. There should be tall knobs through the middle and on the edges. This will allow you to cut through the mud and snow, and make for a great time.
Your tires should be wider giving you more contact with the ground and giving you more grip. You can use a really open spaced aggressive front tire providing you with maximum control. If you are not sure which tire you like, trying asking some local riders which ride the same trails as you.
You will also need to winterize your tire pressure. The higher pressure you run your tires the less grip you will have. The less tire pressure you have the more grip you will have. You can start off by reducing psi by 2 pounds and then test it out. You will have to find what works best for you.
If you are an aggressive rider don’t run your tires too low on psi. If you do you might run your tires off the rim. If you have tubeless tires you might burp them if the psi is too low. This means you burp out air of from the tire because of a strong impact. This can happen if your psi is too low. Again find what works best for you.
3. Protect your bearings
A great way to clean your bike is by using a pressure washer. It will really take away the mud, dirt and snow easily and quickly. But the water pressure as you clean can be very tough on your suspension bearings. Do a complete overhaul of the rear end of your bike.
Take all the pivots apart, and then stuff all the pivots full of grease because if they get washed out by the pressure washer it will mess up the whole rear end of your mountain bike. This will make the rear end too loose and sloppy.
You definitely don’t want that so you need to make sure they are packed with quality thick grease. This will act as a barrier against your pressure washer cleaning. Then after pack then again with grease as a protection from the winter elements.
When was the last time you have your suspension serviced. If it has been some time then wait until winter is over. Then plan to have it serviced in the spring time. You will be even more winterized for next winter.
4. Replace your cable gears
Shifting your gears easily and smoothly is fantastic when it is done at the right time depending on where you are on the trail. But this can all come quickly to an end during winter because of cable friction.
Cable friction is caused by grit, dirt, mud, and water that gets into the system. In order to winterize your cables you should replace them before winter and then again after winter. All you need to do is take them out and flush out the outer housing with a Lotus or light lubricant. What is great is using a spray lube for this.
Another thing you can do other than replace them is to run one full length outer gear cable from the rear shifter to the rear mech or rear derailleur. This way you only have one possible point of entry and exit for water, grit, mud, and grim to enter. This will help to keep your gear shifting smooth and accurate for a longer period of time.
Some riders have one gear cable going to the head tube and then another one going to the rear mech. This set up gives you more of a chance to have friction and water getting into the system of outer cables.
5. Lubricate the front suspension
Lots of mountain bikes have front suspension for control, traction, and comfort. This is even more important during the rough condition of winter. The main task you must do to winterize it, is to keep it clean and well lubricated, otherwise the benefits will be reduced.
This needs to be done before every ride and after your winter rides. Make sure your stanchion tubes which are the upper legs are good and clean. Check that there is no damage to them and nothing is obstructing it.
You can treat them to lower leg service. Or you can do this yourself which is very easy to do. If you don’t want to do this bike shops can lubricate the tubes for an affordable cost. This will make sure the stanchion tube moves up and down smoothly and easily.
You can also turn your mountain bike upside down. This will allow the lube that is already in there to run up back into the top of the fork area. This can be done easily before every ride, and will keep the lube distributed evenly throughout the front suspension.
6. Use the right lube for winter
Usually in summer when conditions are drier you will need to use a dry lube. If you don’t know, a dry lube is a lube with a small amount of lubricant. It will attract as little dirt as possible to the chain or where ever you apply it. But it does wash away quite easily.
During the winter you can;t use a lube that washes away quickly. You need to use a good wet lube. Wet lubes are a lot thicker, so it can attract a lot of stuff to your chain which can eventually wear out your drivetrain. So you need to keep track of this.
Every time you wash your bike you will need to reapply the wet lube. If you don’t use a wet lube your bike will be unprotected and the bike parts will not move as smoothly as they should in winter. You can even add lube when you are on the trail if you need to.
7. Change brake pads
Be sure to check what type of brake pads you are using. In winter brake pads will wear out much faster than during the spring and summer. Keep a closer eye on the back ones because they will wear quicker than the front ones.
In order to winterize your brake pads remove your old ones and put on sintered pads. Sintered brake pads will perform better and last longer in snowy wet conditions. They don’t have that same initial grip like resin pads but sintered are better for winter, plus you don’t need to slow down abruptly.
Resin pads are not for winter riding. I knew a guy who began his ride with half worn resin brake pads. Then only 3 hours later the pads had worn all the way down to nothing. Don;t let yourself be that rider, switch to sintered pads for winter.
8. Boost your grip
Many riders have found including myself that the worst thing that can happen to your grips is to have them spin around. It does not matter how tight you grip them, they still spin around on your handlebars.
This is what happens in winter if you have push on or slide on grips. Switch them out and put on some lock on grips. Then tighten them up with your 2.5 ml allen key. Now, no matter how much snow and wet there is, those grips are not going to spin. Now you can focus on your ride.
9. Get mudguards
On the trail or on the road there is going to be mud, water, and snow flying up everywhere. It is a good idea to get a front mudguard. This is so you can keep all that stuff from flying up into your face. Its really annoying. A front mudguard will allow you to ride faster in winter.
There are two main types of mudguards, there are the simple flaps you can get. Or you can get the larger ones which are like an extended fender.
Depending on where you ride you may need one or the other. If you ride in an area which has thicker clay and mud, plus the snow is heavier and more compact, then you will want to use the smaller ones. If you were to use bigger ones the thicker snow and mud will clog up the bigger fenders.
If you ride in an area where the mud is thinner and wetter. The snow is more rainy and sleet like then get the larger mudguards. This is because for this type of condition you will have a lot of spray flying up into your face and larger guards are better.
If you want the best of both worlds you can try larger fenders, but make sure they are clip on. Then if they get clogged up, you can just clip them off and wipe away the mud and snow which built up during the ride.
10. Light up your winter ride
Winter is generally a darker season. So even though you may be riding during the day, it is a good idea to use lights. Get the best lights you can afford. You need to be able to see others and the trail and other riders need to see you coming and going.
You should have a rear light which has at least 75 lumens. That may not seem like much but it is bright enough for other to see it clearly during the day. It is even more important to have on a cloudy and or snowy day.
On your handlebars get a light which has at least 1500 lumens. This is good enough for mountain bike riding in winter. The forest can get dark during the day when there is no sun out and only clouds above.
If you are going to ride at night then put the 1500 lumen light on your helmet. On your handlebars get a bigger light which has around 4700 lumens to light your way. You can make the light last longer by not turning it to full power.
11. Add paint finish protection
The combination of mud, snow, water, salt, and dirt can create a dangerous mixture. This mixture in winter is like a grinding paste which can take away the shine and glow of your paint finish. You don’t want your bike’s paint finish to be ruined by the time spring comes around.
The top tube of your bike frame is especially exposed to the rough weather conditions of winter. If you wear knee pads to keep warm, then they may become soaked with water, mud and snow. The constant rubbing of your knees on the top tube can dull the paint finish over time.
To protect your paint finish, you may want to get a bike frame protection kit like Invisiframe. If that is not affordable for you, you can get a roll of 3M heli tape. It is easy to apply to your bike and it will prevent erosion, scratches, tears, and punctures. Most of all it will keep your frame shiny for the spring when you can just easily peel of the 3M tape.
12. Use a water displacer
If you want your bike to perform very well in winter then you need to keep water away from all the moving parts of your bike. After every ride in winter your bike will have picked up moisture, water, muddy water, and water from melted snow.
Give all the moving parts of your bike a good wiping, and use a good water displacing lube like WD40 just be sure everything is flushed out. Apply this to your suspension pivots, around your chain rings, the chain, the cassette, all the moving parts which could become corroded.
If you ride your mountain bike on the road in winter then your bike is going to pick up salt. This can really be corrosive to the moving parts of your bike. Be sure to wash off all the salt that has accumulated. Then use a water displacer, and after apply a lubricant to it.
13. Other moving parts to lube
Lubing your bike for the winter seems to be a pretty strong theme. Maybe it would be easier to just dunk our bike in a tank of oil.
Your bottom bracket takes an especially large amount of abuse during the winter. This is because it has all the torque going through it because of the constant pedaling. It is also directly behind the front wheel, so all the muck that riders go through will be thrown on to the bottom bracket.
Take your bottom bracket out, and check the bearings, add some fresh new grease. Then make sure it is nice and clean and good to go. You should also take the headset out and check that the bearings are greased on the outside of the bearing itself. This will perform as protection.
Keep working around the entire mountain bike systematically. Add a good coating of grease anywhere there are bearings so they are all protected for winter.
Believe it or not your seat post is an entry point where moisture and water can get into the frame. Use some grease between your seat and the frame. If you have a carbon frame, then use an assembly compound or a carbon specific grease.
A carbon specific grease has the right particles in for grip between the parts. Don’t use regular grip for carbon because it will be bad for the carbon itself.
Winterizing your bike does take some work, but not that much to get the job done. It is definitely worth it for protecting your bike during the winter.
Related